One of QuickBooks’ most powerful and frequently used features is the ability to run multiple user accounts. Often different people need different levels of access, or the organization needs a solid audit trail for determining who made changes.
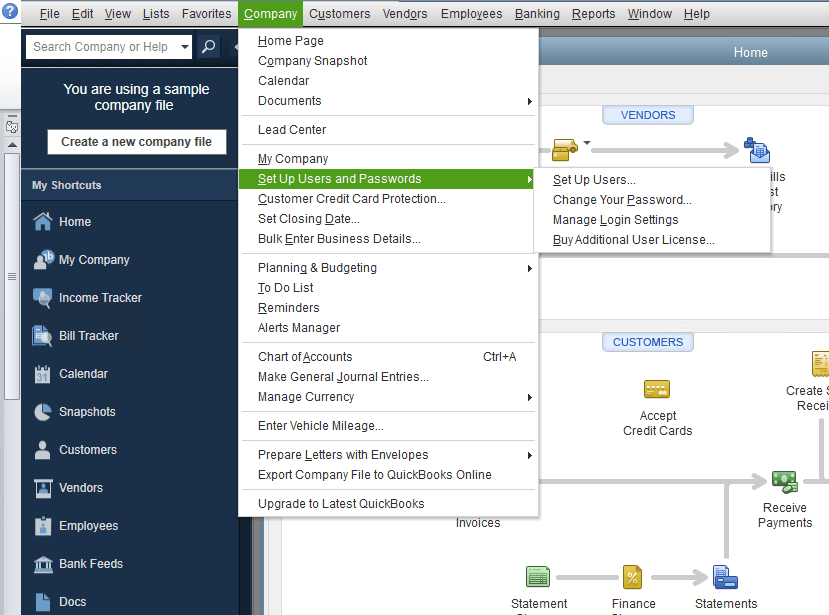
To start, log in to your company file on QuickBooks using the Administrator login. Once the file is open, click on the “Company” tab, then highlight “Set Up Users and Passwords”, and click on “Set Up Users” in the menu that pops out.
This should bring up the User List, which should look something like this:

Once here, select “Add User”. This will prompt you to enter a User Name and Password.
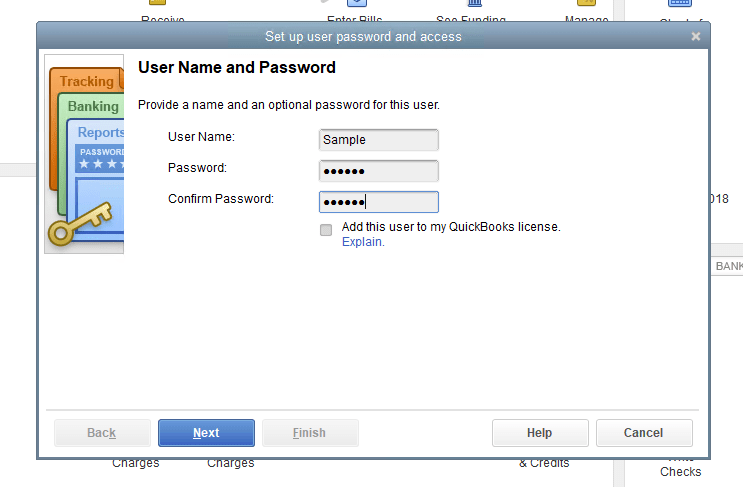
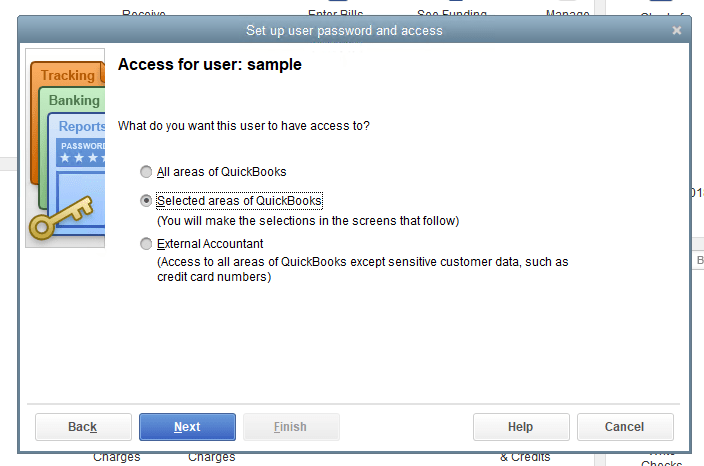
Once entered, hit Next. This will bring you to the User Access section of account creation. To create a user without write capabilities, you’ll want to select the “Selected areas of QuickBooks” option, and hit next.
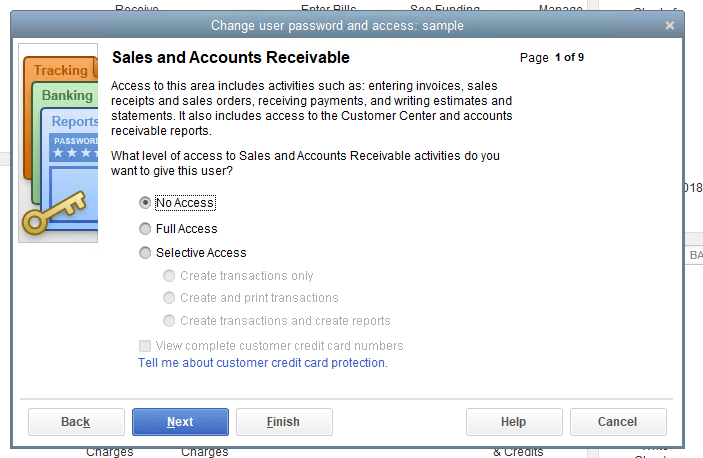
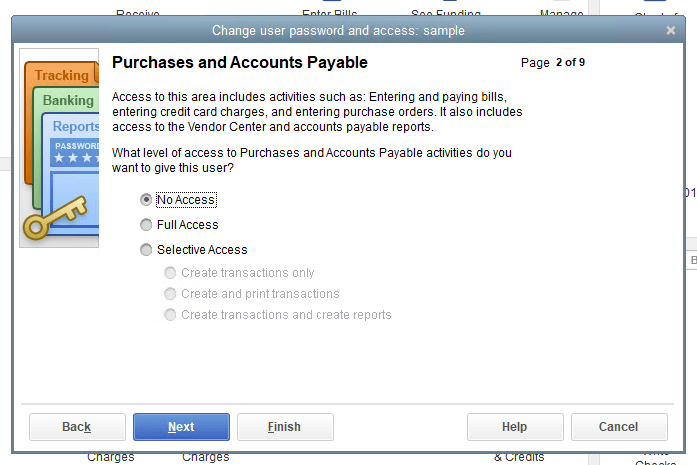
For most of the following options, you will want to select “No Access”, except for “Sensitive Financial Reporting”, which you will want to grant either Full Access, or the option to “Create sensitive reports only”, depending on whether the user should be permitted to print this information.

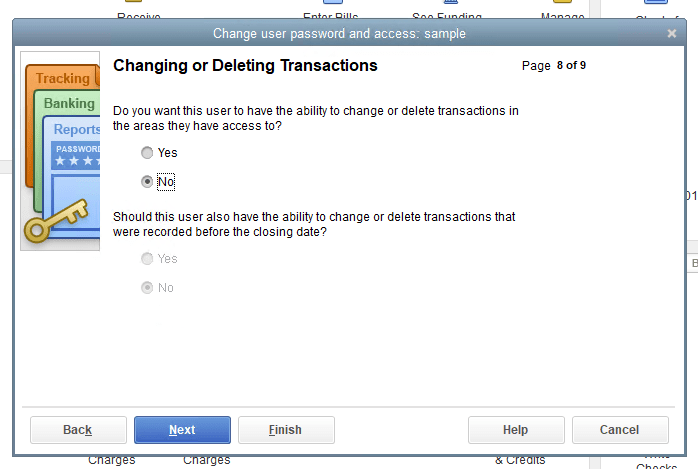
Select “No” on the next page, when asked whether to let the user change or delete existing transactions.
The next and final prompt will show permissions granted, and is available only for review. Click “Finish” to complete the account creation process.
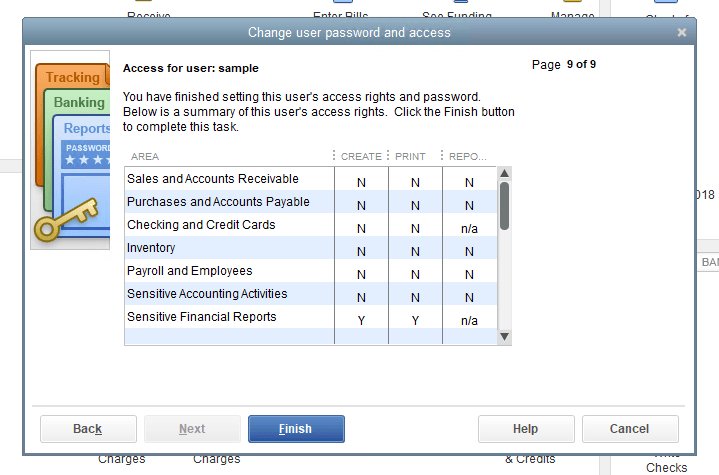
A user account created this way will have restricted navigation within QuickBooks- individual invoices and full customer detail pages will not be visible, but full reporting access will allow a user to find all the same information between the various inventory and sales reports, and the “Customer Contact List” report.